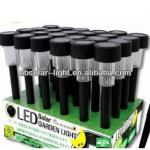
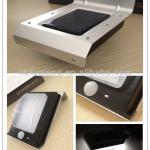
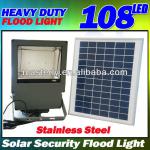
2013 solar outdoor flood light,garden solar light - MSL04-06-10W
| Place of Origin: Zhejiang China (Mainland) | Brand Name: MSL | Model Number: MSL04-06-10W | Light Type: LED |
| Protection Level: IP65 | Rated Power: 5W | Voltage: DC 12V | Lamp Luminous Flux(lm): 500 |
| Lamp Luminous Efficiency(lm/w): 80 | CRI (Ra>): 70 | Color Temperature(CCT): Pure White | Working Temperature: -15~55 |
| Working Lifetime(Hour): 100000 | Lamp Body Material: Aluminum | IP Rating: IP65 | Base Type: E27 |
INSTALLATION
1. Mount the light fixture in your desired location (mounting hardware not included) using the attached metal bracket with holes as the support bracket. This bracket can be used as a stand and put directly on the ground or bolted through the holes to your house or post. Adjust tilt and tighten bolts on the fixture where the bracket meets it.
2. Find suitable area to place solar panel in full sunlight without shadows crossing the panel within the wire length from the panel to the fixture. There are two solar panels for this light unit. Connect them in parallel using provided cable connected to them.
3. Plug in the white male adapter piece on the wire from the panel to the corresponding female adapter 6 (fig.1)
located beside the switch on the fixture.
4. The power switch1 hidden inside the screw cap located at the rear part of the fixture. Unscrew the cap and push the red button to switch ON the light. At least 8 hrs in full sun exposure .The battery can be charged whether the power switch is in ON or OFF position.
After this the light will automatically turn on at night and turn off at dawn (light will only come on at night). In case the battery is not fully charged the light can light on for shorter period. Be sure that it is normal.
BATTERY CHANGING
The LEAD-ACID battery included with this product is rechargeable. Like all rechargeable batteries, however, they will eventually need to be replaced. If the light should begin to illuminate for shorter durations of time, you should replace the rechargeable battery in the following way as shown in Fig.2.
1. Take a screw driver and take out the six screws 5 that hold the front panel 2 onto the light.
2. Take off the front panel gently and softly to avoid damaging it.
3. Unscrew the four screws 3 and remove the straps 4 that fix the battery.
4. Take off the battery carefully and pull out the wires connecting to circuit board from positive and negative terminals of the battery.
5. Take off the old battery.
6. Replace new battery of same kind and capacity.
7. Connect the two wires to the Positive terminal(red) and the Negative terminal(black) of the battery. Be sure connecting to polarities are correct.
8. Then mount the front panel on tightly with the six screws.
MAINTENANCE
DISCONNECT THE SOLAR PANEL FROM THE UNIT EACH TIME THE UNIT IS NOT USED.
Turn off “switch” when unit is not working. Please disconnect water-proof connector when the unit is not being charged. To prolong the battery life, the unit must be charged once or twice a month when the unit is not used.
| Packaging Detail:1pcs/carton. general packing according to our company, or special packing according to clients Carton size: 390x370x210mm Weight: 7.5kg |
| Delivery Detail:7 days for sample,30 days for mass production |


